Jan 23, 2014

Let's play with the Studio Calico Scrapbooking January Kit

Hello there,

Let's play Design team today... and what is that? Well, when you create layouts only with what you got in a kit, I call it this way. As it is exactly what the Design Team has to do when they receive a kit to promote it. I found this game pretty challenging sometimes. But at the same time it can be great to grow as a scrapbooker. It is also a good idea to avoid accumulating things that you actually buy but you don't end up using. If you challenge yourself to use only what it came on the kit I am sure you will end up using most of the items. Do you want to try?

This month I got the Studio Calico Scrapbooking January Kit (find it here). At this point I finished 3 layout working with only this material... and I have still plenty items to make one or two more layouts. Ok. I cheated a bit I used some Mr' Hueys...but hey! They are from Studio Calico as well and they are barely ever on a kit so hahaha that's good for me.


Layout #1: Celebrate Life


Layout #2: Labwork


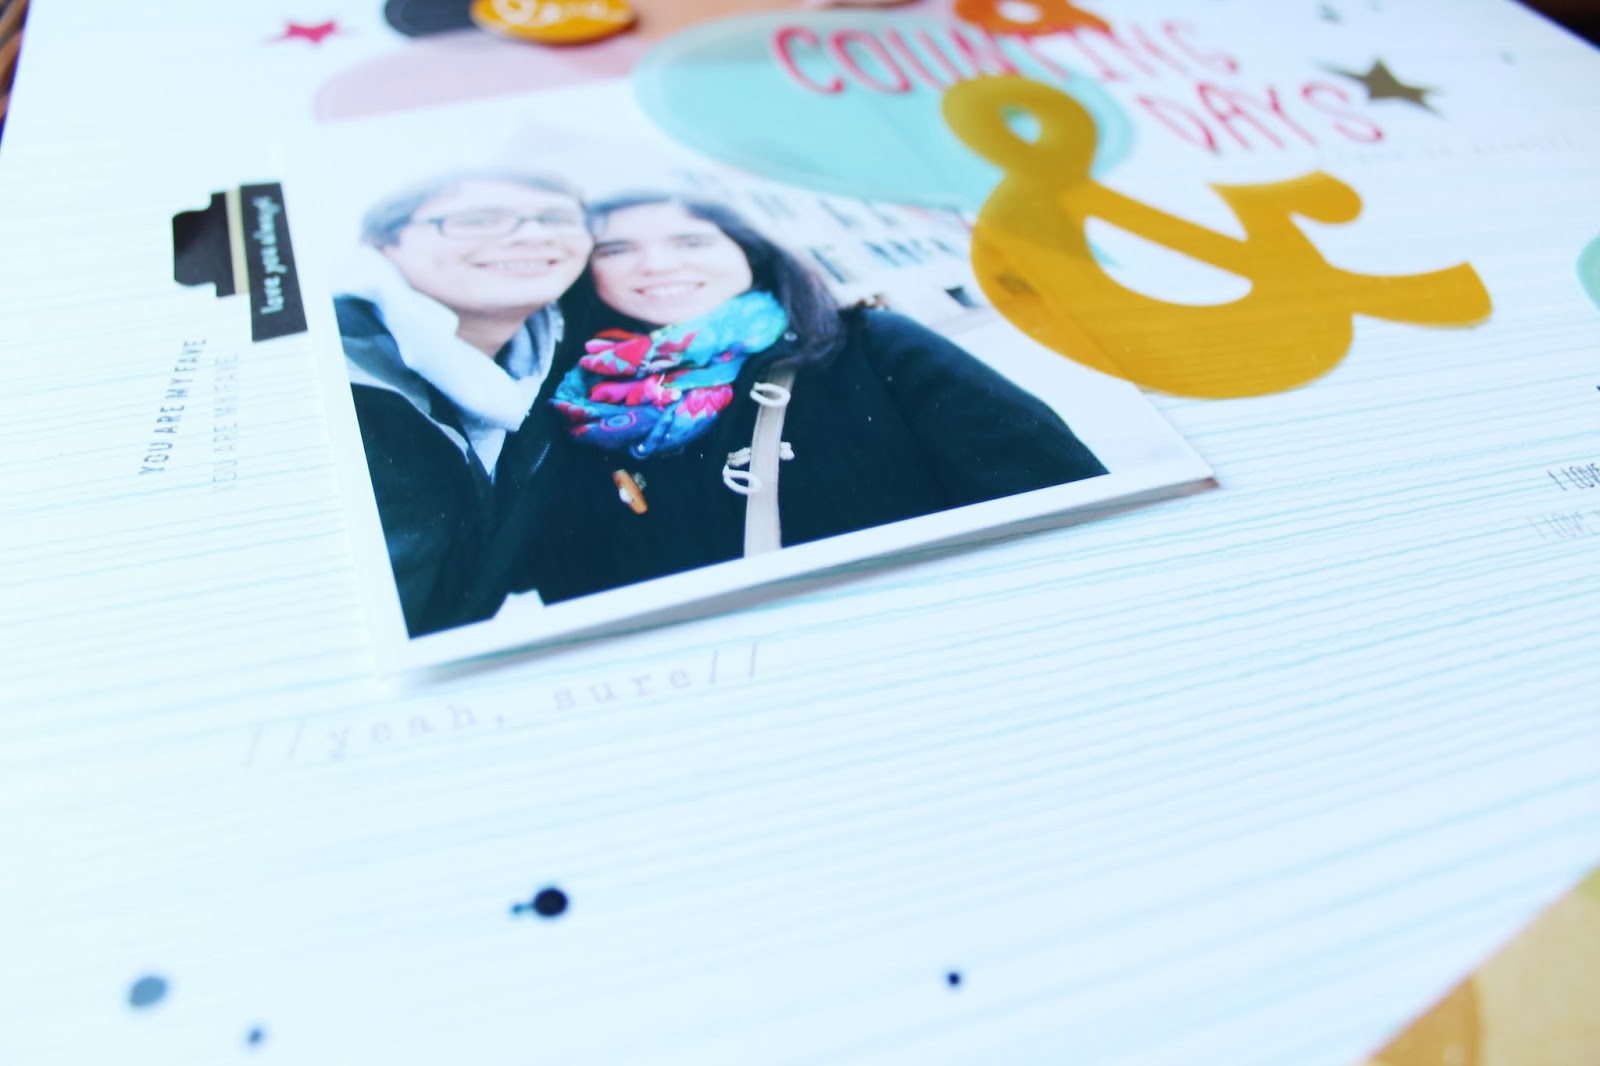
Layout #3: I love navy


Do you spot every item from the kit? I hope so! Stay tuned 'cause next week I will so each layout more in detail.

xoxo

Boo


////////////////////////////////////////

Hola ,

¿Jugamos al equipo de diseño hoy?... y ¿qué es eso? Bueno, pues cuando se crean diseños sólo con lo que viene en un kit, yo lo llamo así. Ya que es exactamente lo que el equipo de diseño tiene que hacer cuando reciben un kit para su promoción. A veces este juego puede resultar bastante difícil. Pero, al mismo tiempo puede ser muy beneficioso para crecer como scrapbooker. También es una buena técnica para evitar la acumulación de cosas que se compran y que al final no se usan. Además así seguro que acabas usando la mayoría de los artículos en el kit. ¿Quieres probar?

Este mes me hice con el Kit de Studio Calico Scrapbooking enero (puedes encontrarlo aquí). Hasta este momento he terminado 3 layouts con sólo este material ... y aun tengo elementos suficientes para hacer uno o dos diseños más. Ok . Hice una pequeña trampa, utilicé un poco de Mr. Hueys... pero bueno son de Studio Calico así que... y ya que casi nunca vienen en un kit pues... jajaja a mí me vale.

¿Ya habeís encontrado todos los elementos del kit? ¡Espero que sí ! Estad atentos porque la semana que viene los enseñaré en más detalle.

xoxo

Boo

Jan 22, 2014

Counting Days (Biscuit Project DT)

Welcome again!

Today I am bringing you another beautiful project made with the January Scrap Non-Stop kit from Biscuit Project. I was captured by the wide variety of colors in the kit.


When I received the kit the first thing I did (well after jumping of happiness) was opening the vellum embellishment pack. As soon as they circle embellishments fell over the cardstock on a beautiful spread I knew i had to incorporate them in that way. So that is what I did!


To make it more dynamic I glued some stickers on top of them as speech bubbles and I also added my title and a few ampersands and stars.


To make the page more coherent I added a piece of cardstock at the bottom. The colors of that paper totally combine with the elements of the rest of the page. The only thing that I used which is not included in the kit was that little black label to write on my journaling.


And of course some rolling stamping which in fact you can buy at their shop.

See you soon!

xoxo

Boo

//////////////////////////////////////////////////////////////////

!Bienvenidos de nuevo!

Hoy os traigo otro genial proyecto hecho con el kit de Scrap Non-Stop de enero de Biscuit Proyecto. De nuevo, me encontré capturada por la gran variedad de colores en el kit.

Cuando recibí el kit de la primera cosa que hice (bueno después de saltar de la felicidad) fue abrir el paquete de adornos "vellum". Tan pronto como vi la forma que tomaron los adornos al caer todos juntos sobre la cartulina, se me ocurrió la idea de colocarlos de esa misma manera. ¡Así que eso es lo que hice!
Para hacerlo más dinámico pegué unas pegatinas en la parte superior de ellos en forma de burbujas de comic y también añadí mi título y algunas estrellas.
Para hacer la página más coherente añadí un pedazo de cartulina colorida en la parte inferior. Los colores de papel combinan perfectamente con los elementos del resto de la página. Lo único que he usado que no esta incluido en el kit, es ese pequeña tarjetita negra para escribir.
Y, por supuesto, algunos roller stamps los cuales, de hecho, puedes comprar en en su tienda.

¡Hasta pronto!

xoxo

Boo

Jan 20, 2014

I'm In Jot Magazine Issue 4

Oh Happy day!

I couldn't be more excited today because... some of my projects are published in the Jot Magazine Issue 4!! Yaaaaay!! Such a "I'm very proud of myself" moment. hehe Have you ever read this on-line Scrapbooking magazine? Maybe not as it is pretty new (they only have 3 previous issues) but since the first issue I fell trapped by their beautiful pages and now I am a regular reader of it. You can find lots of inspiration on their pages and the best thing is that it is completely free! wohooo!! So, I hope you head over their web site now to read their new issue (find it here). And don't forget to look for my 3 projects over the pages.


You can read more about my projects here, here, and here.

xoxo

Boo


////////////////////////////////////////////////////////////////////////////////

Feliz dia!

No podría estar más emocionada hoy, ya que... !algunos de mis proyectos han sido publicados en la edición 4 de la revista Jot Magazine! !Siiiiii! Hoy he tenido un momento de esos de "Estoy muy orgullosa de mí misma" jeje ¿Habeís leído alguna vez esta revista de Scrapbooking on-line? Quizás no, ya que es bastante nueva (sólo tienen 3 números anteriores), pero desde el principio me enganche y ahora soy una lector habitual de la misma. En ella podréis encontrar un montón de inspiración y lo mejor de todo es que es completamente gratis! wohooo! Por lo tanto, espero que os lancéis de cabeza a su web ahora para leer su nueva edición (podéis encontrarla aquí). Y no olvidéis buscar mis 3 proyectos en sus páginas. 

Para leer más acerca de mis proyectos podéis encontrar los post previos aquí, aquí, y aquí

xoxo 

Boo

Celebrate Life

Hey there,

Today I am excited to show you some of my first photos with my treasureeee, ups... I mean with my new camera. hahaha My family made me the best Christmas present: a Canon EOS 1100D Camera!! I looooove photography, I even took some photography courses during my exchange year in Texas, but I never expected a present as good as this. They totally reached and passed my expectations for a good Christmas present. I really appreciate it. Thanks!

Besides I'm still learning how to use it, and where to find my inspiration from... and which are the best light conditions, set-ups and all that, I love to take photos with the manual settings not just automatically. So, a few days ago I decided to challenge myself: I grabbed some confetti and started playing with different settings and locations at home. It was like trying to photograph kids or animals (always on the move). But in the end I think I achieved a few fun and beautiful photos to thank my family for this great present. They may be not perfect, or super sharp but they show who I am and how thankful I am so that's enough for me at this moment.

Everyday is a good day to celebrate life with some confetti. Who needs a better excuse right?

xoxo

Boo


////////////////////////////////////////////////////////////////////////////////////

Hola,

Hoy estoy super emocionada de mostrar algunas de mis primeras fotos con mi tesoroooo, ups... quiero decir con mi nueva cámara. jajaha Mi familia me hizo el mejor regalo estas Navidades: una cámara Canon EOS 1100D. Siempre me ha gustado la fotografía, incluso tomé algunos cursos de fotografía durante mi año de intercambio en Texas, pero nunca me hubiera esperado un regalo así.  Alcanzaron y pasaron de largo totalmente mis expectativas de un buen regalo de Navidad. No sabéis como se lo agradezco. ¡Gracias!

Aunque todavía estoy aprendiendo a usarla, a saber dónde encontrar mi inspiración y cuáles son las mejores condiciones de luz, montajes y todo eso, me encanta tomar fotografías con los ajustes manuales no solo de forma automática. Así que, hace unos días me desafié a mí misma: cogí un poco de confeti y empecé a jugar con diferentes configuraciones y ubicaciones. Fue igual de difícil como tratar de fotografiar a niños o animales (siempre en movimiento). Pero al final creo que conseguí algunas fotos divertidas y monas para  agradecer a mi familia por este gran regalo. No son perfectas, o súper nítidas pero muestran cómo soy y lo agradecida que estoy y eso es suficiente para mí en este momento .

Cada día es un buen día para celebrar la vida con un poco de confeti. ¿Quién necesita una excusa mejor ¿no?

xoxo

Boo

Jan 15, 2014

be pretty

(texto en español al final de la entrada)

Hello fellows,

I hope you enjoyed my last post with the step by step tutorial (find it here). Because today I am sharing a page that I made following the same idea, techniques and embellishments but with a different meaning. I know that both of them (specially this one) has a spring feeling, but I just can't wait for spring to come! :) Too early to say that? Hope not!


For this page instead of using a triangle mask made by myself, I used a chevron mask by Studio Calico. Using the same technique (molding paste + white acrylic paint) I created this tone on tone effect.


I paint my tittle with the same nail polish. In fact it is the same one that I am using on the photos. I like the different effect of the Mr Huey's splashes on the cardstock and on the molding paste.


As you have may already noticed, for this page I used more girlie elements in comparison with the previous one. I had that flower sticker on my stash for ever, but I finally find the perfect spot to use it. Again I added the cute pastel colored feathers and some little wood pieces.


Have you spotted that corner on top? For me is the little details which makes the perfect page.

xoxo

Boo

/////////////////////////////////////////////

Hola a todos,

Espero que hayáis disfrutado mi último post con el tutorial paso a paso (podéis encontrarlo aquí ) porque hoy quiero compartir esta página que hice siguiendo la misma idea, las mismas técnicas y los adornos de la misma colección, pero con un significado diferente. Sé que ambos (especialmente éste) tiene una sensación primaveral, pero es que simplemente ¡¡¡no puedo esperar a la primavera ya!!! :) ¿Es muy pronto para decir eso? ¡Espero que no!

Para esta página en lugar de utilizar una máscara con forma de triángulo hecha por mí, he usado una máscara "chevron" de Studio Calico. Utilizando la misma técnica (pasta de moldeo + pintura acrílica blanca ) he creado este fondo con el efecto sobre tono .
De nuevo el titulo está pintado con el mismo esmalte de uñas. De hecho, es el mismo que llevo puesto en las fotos. Me gusta el diferente resultado de las salpicaduras de la tinta Mr. Huey sobre la cartulina y sobre la pasta de moldeo. ¿Os habéis fijado?
Como ya os habréis percatado, para esta página utilicé elementos más femeninos en comparación con el anterior. Esa pegatina gigante de flores de Dear Lizzy ha estado sobre mi mesa tiempo y tiempo pero al final me decidí a usarla en esta página y me parece el lugar perfecto para usarlo. Una vez más he añadido las plumas de color pastel  y algunas pequeñas piezas de madera.
¿Te has fijado en esa esquina en la parte superior ? Para mí son los pequeños detalles los que hacen que la página sea perfecta.

xoxo

Boo