
Good Afternoon from Braunschweig!
I am still adapting to this place and to the fact of not having blinds on the windows...so yeah! I suddenly have become a super morning person whether I like it or not hehe That is why I finally got a chance to prepare this post. I wanted to show you this mini I made about my last vacations in Mexico D.F. so bad and for so long!! So please sit down, grab a cup of coffee and enjoy! :)


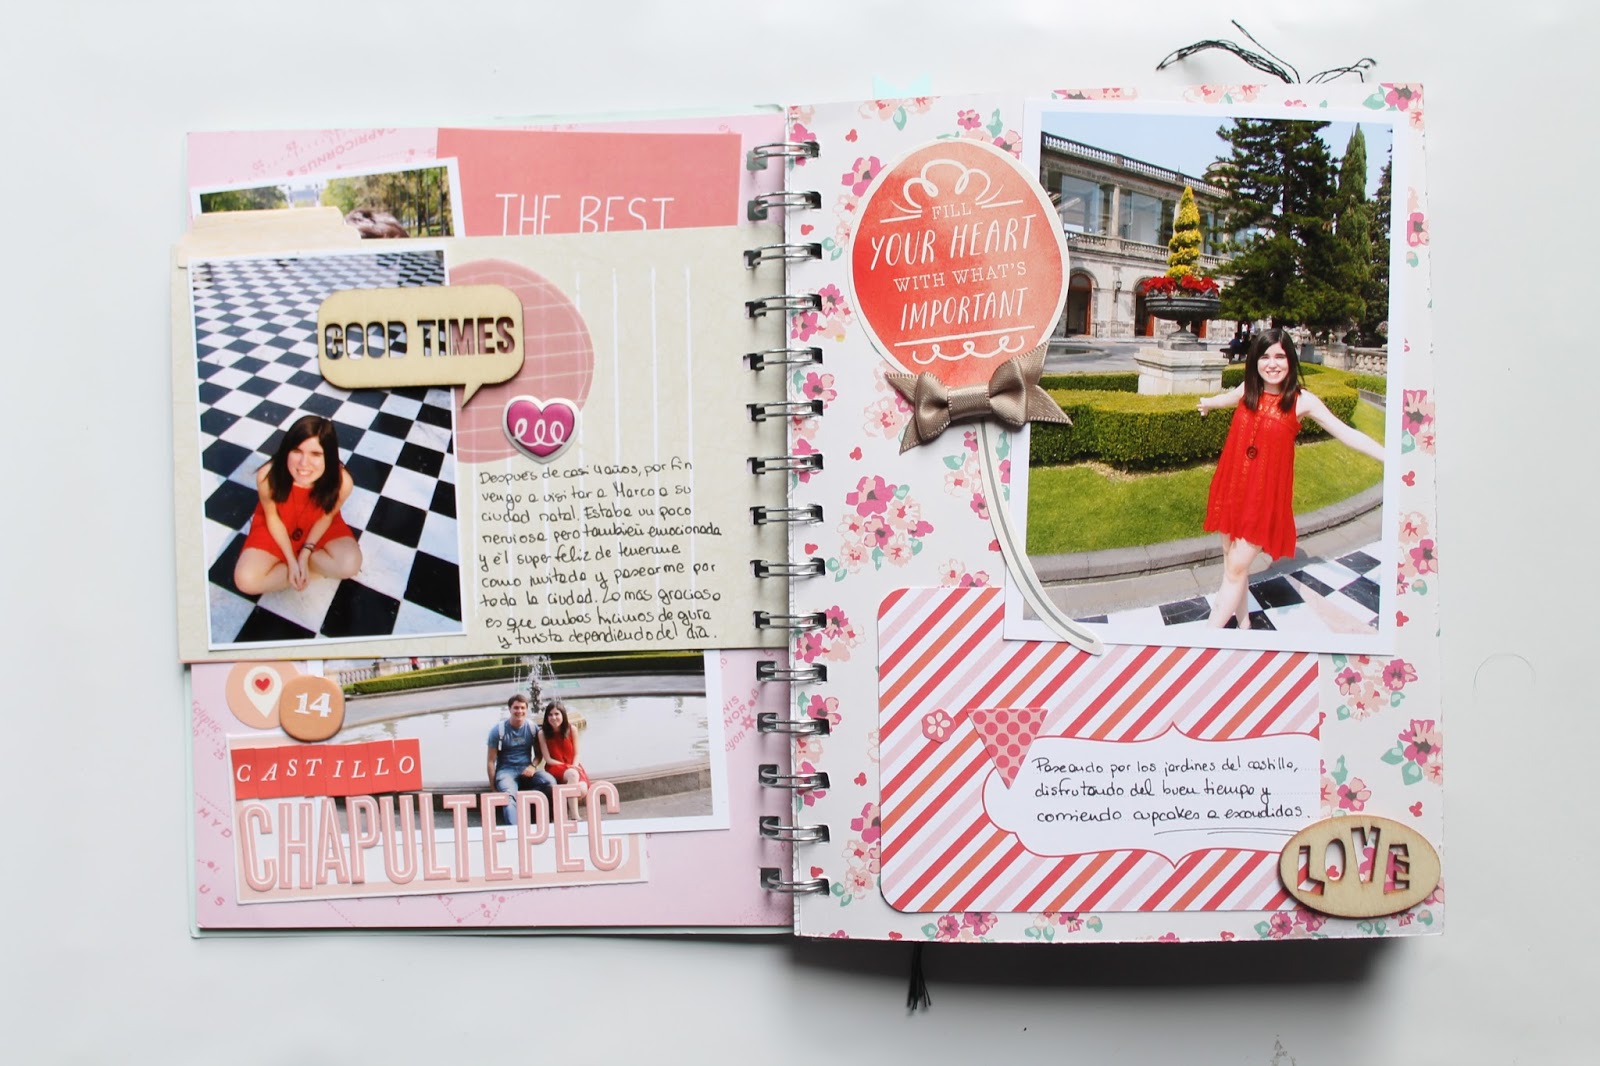
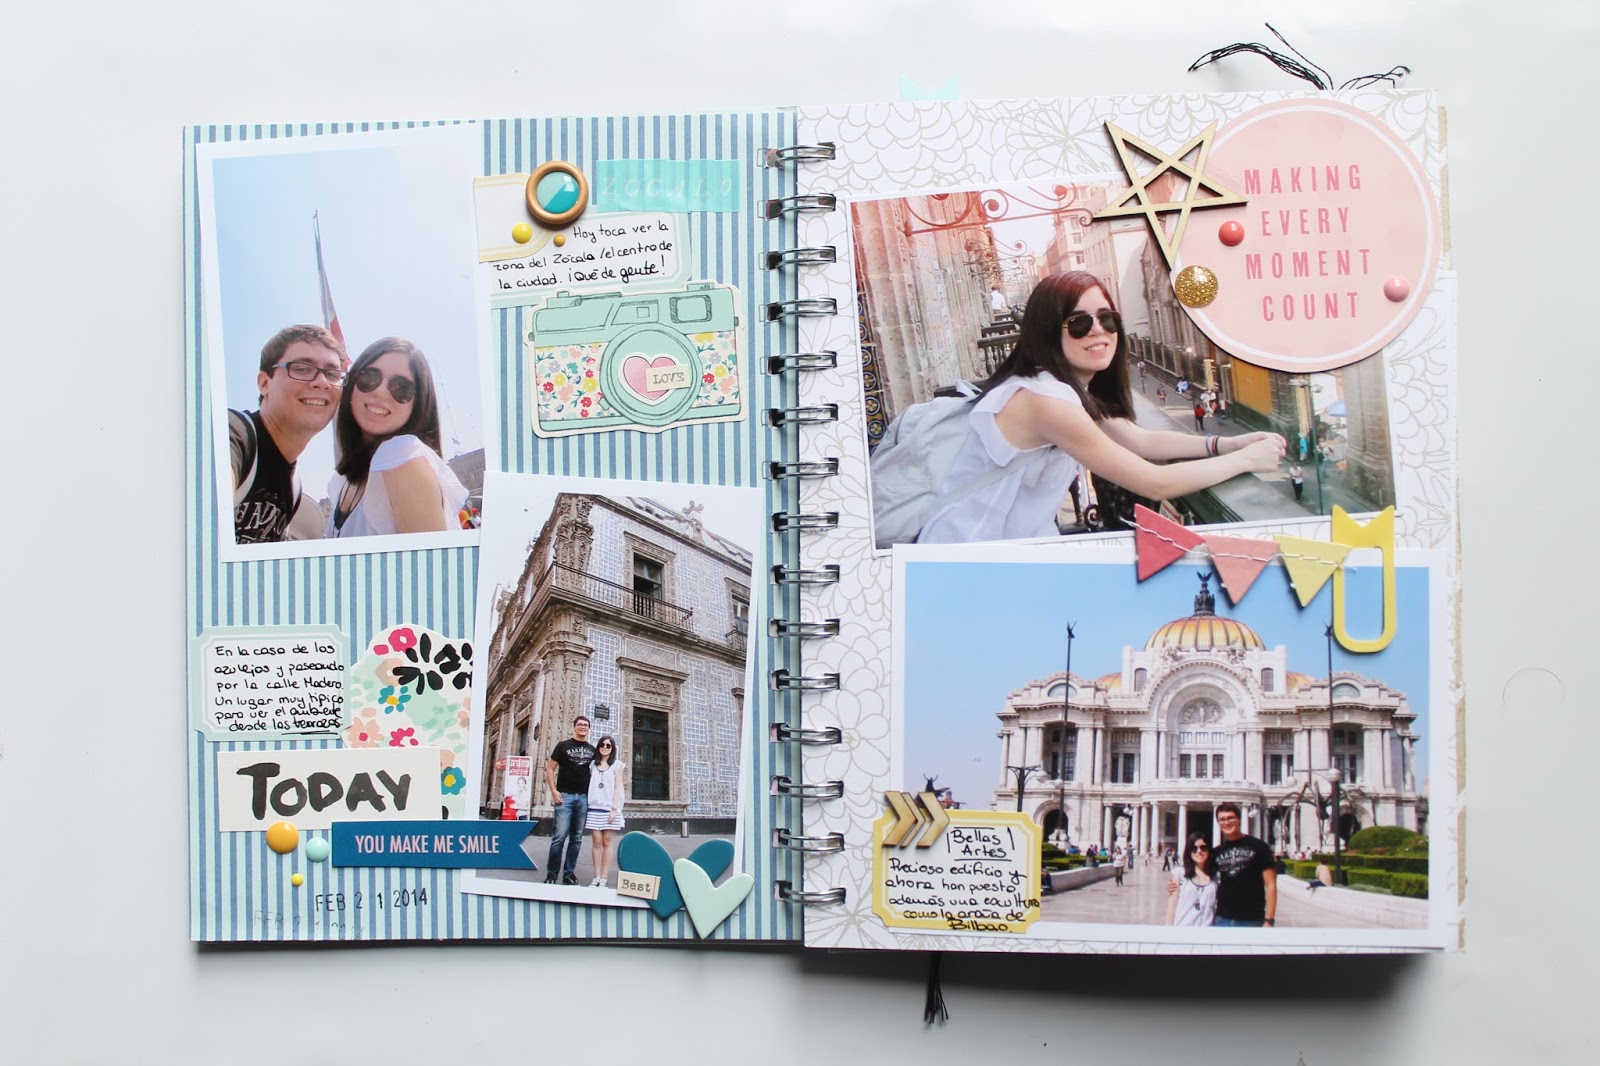
When I started making the mini album I already knew I wanted to make super colorful and happy and detailed pages. I also tried to include different inserts and supplies so I look through my stash and I chose a bit of everything; project life cards, 12x12 papers, 6x6 papers, die-cuts, clips, alphabets, labels, tags, enamel dots, thickers, printables, wood veneers... and everything I could think of. Making this mini album was a great way to finish with all those half used packages, kits and random stuff.


When I make mini albums about travels I always try to place the photos as chronologically as I can. It will keep the memories on a better way. I always add the date on the first page with photos belonging to that day. Have you spotted them? I hope you don't get lost among all the cute details. I also try to incorporate photos of different sizes to make it more fun and interesting.


This journey was very special to me so I wanted to make a mini very special too. We were lucky enough to celebrate our birthdays together this year. We had tons of fun and we eat a lot of delicious things... because if you eat them on your birthday, all the calories don't count, right? ;) We also discovered the city together. Although both of us visited the city previously we still found some new places to go.


I keep all the memorabilia inside the craft envelope. But as the album was already very thick with all the thickers and dimensional elements I didn't glued inside the last page, as I usually do, because otherwise the album wouldn't close properly. Instead of that, I keep it attached to the album with a ribbon at the back side, very easy to remove whenever I want to see the album or the inside of the envelope.
I hope you like it and please make more minis! They are so cute!!!
xoxo
Boo
/////////////////////////////////////////////////////////
¡Buenas tardes desde Braunschweig!
Todavía estoy adaptándome a este lugar y al hecho de no tener persianas en las ventanas ... así que ¡sí! De repente me he convertido en una persona súper madrugadora tanto si me gusta como si no jeje Por eso finalmente tuve la oportunidad de preparar este post. Quería enseñaros este mini que hice sobre mis últimas vacaciones en México DF desde hacia tanto tiempo... Así que por favor tomad sitio, preparaos una taza de café y ¡disfrutad! :)
Cuando empecé a hacer el mini-álbum sabía que lo que quería era crear un mini con páginas súper coloridas y alegres y detalladas. También quería intentar incluir diferentes tipos de páginas y materiales así que busqué por mi mesa y elegí un poco de todo; tarjetas de Project Life, recortes, papeles 12x12 y también 6x6, maderitas, clips, alfabetos, etiquetas, tarjetas, enamel dots, pegatinas, imprimibles... y todo lo que podía encajar en un mini. Crear este mini-álbum ha sido una gran manera de acabar con todos esos paquetes utilizados a medias , kits empezados y cosas al azar que me habían sobrado.
Cuando hago mini-álbumes sobre viajes siempre trato de colocar las fotos cronológicamente, al menos tanto como sea posible y recuerde., de esta manera los recuerdos se mantendrán de una mejor manera. Siempre añado la fecha de los días en la primera página con fotos pertenecientes a ese día. ¿te has fijado? Espero que no se pierdan entre todos los detalles. También trato de incorporar fotos de diferentes tamaños para que resulte más divertido e interesante.
Este viaje fue muy especial para mí, así que quería hacer un mini muy especial también. Tuvimos la suerte de celebrar nuestros cumpleaños juntos este año. Disfrutamos un montón y nos comimos un montón de cosas deliciosas... porque si se comes un montón de dulces en tu cumpleaños, las calorías no cuentan, ¿verdad? ¿o no era así? ;) Visitamos también la ciudad juntos, aunque ambos ya habíamos visitado la ciudad anteriormente, todavía encontramos nuevos lugares por descubrir.
¿Y todos los tickets y recuerdos? Los he guardado todos en el sobre kraft. Pero como el álbum ya era muy grueso con todas los thickers y elementos dimensionales, decidí no pegarlo en el interior del album en la última página como suelo hacer, ya que no se cerraría correctamente. En lugar de eso, lo mantengo unido al mini con un lazo en la parte de atrás, muy fácil de soltar para ver el álbum o el interior del sobre.
Espero que los haya gustado y que os animéis a hacer mas minis.
xoxo
Boo
This is amazing! How do you make this type of album? Do you have a tutorial?
ReplyDeleteThanks!!! I am sorry I don't... I just grabbed whatever I had on hand and started playing with my photos. But maybe in the future I will have time enough to make a tutorial as well ;)
Deletexoxo
Te ha quedado genial, has sabido combinar las diferentes colecciones a la perfección, vamos que parecen una sola. Un resultado de 10!!!! Felicidades por el trabajo bien hecho!!!!!
ReplyDeleteBesitos.
jajajaja Muchas gracias!!! Vamos que podria decirse que me he hecho mi propio kit no?;) Supongo que al final acabo teniendo siempre cosas que combinan ya que casi siempre son las tipicas mismas cosas que me llaman la atención.
DeleteXOXO
Precioso!!! Me encanta el formato, pudiendo incluir tantas fotos!!! Es genial!!!
ReplyDeleteGracias!! sii, sabia que tenia que combinar un monton de distintos tamaños de fotos y paginas para que al incluir tantas fotos no pareciera muy monotono, sino más divertido!
Deletexoxox