Showing posts with label Mini album. Show all posts

Mar 13, 2016

DIY: Envelope Pocket

Hello there,


You can find now on the Dear Lizzy blog two different DIY ideas to create with her newest collection (DIY CACTUS PIÑATA and DIY: ENVELOPE POCKET).

It is not a secret that I LOVE to make mini albums of my little adventures around the world, or even about the little things in life. But, lately, I realized that not only I enjoy to look back at the photos, or to rediscover the story through the album, but also to bring back all the memories with gathered memorabilia along the way.
DIYenvelope1
The bright transparency from the new Happy Place line, gave me the idea to make a little cute envelope out of it. This is perfect to keep some tickets, business cards or even extra photos from my last summer vacation. It was super easy to make and I love the fun look of it. Let’s take a look on the steps to make this:
DIYenvelope2
1. Pick the width of the envelope and trim the paper down. I find that 4×6 or 4×5 it is a good size for most minis and it is normally big enough to fit the usual memorabilia. So, I cut the 12×12 transparency into a 12×4 stripe. You can use an envelope template to serve you as a guide as well.
DIYenvelope3
2. Fold the paper to create the pocket of the length you desire, and stitch the sides. Remember to leave a couple of inches on top in order to create a folded lid.
DIYenvelope4DIYenvelope5
DIYenvelope6
3. Now you have the basic structure completed. The tricky part is to choose how you want to close the envelope. In my case, I punched a couple of tiny holes to add two eyelets (one on the lid and one on the pocket) with a one-inch circle paper around. Then, I used a gold string that came with the Dear Lizzy tassels to tie the envelope shut.DIYenvelope7
4. As I final touch, I attached a couple of fun tassels from the Happy Place collection.
And done! Now go and grab some memorabilia and add this to your planner, a layout, a mini album, or even to your project life album (you can always punch two holes on a side or at the bottom to add it to a ring album). Let’s bring those memories alive! 
DIYenvelope8

Dec 6, 2015

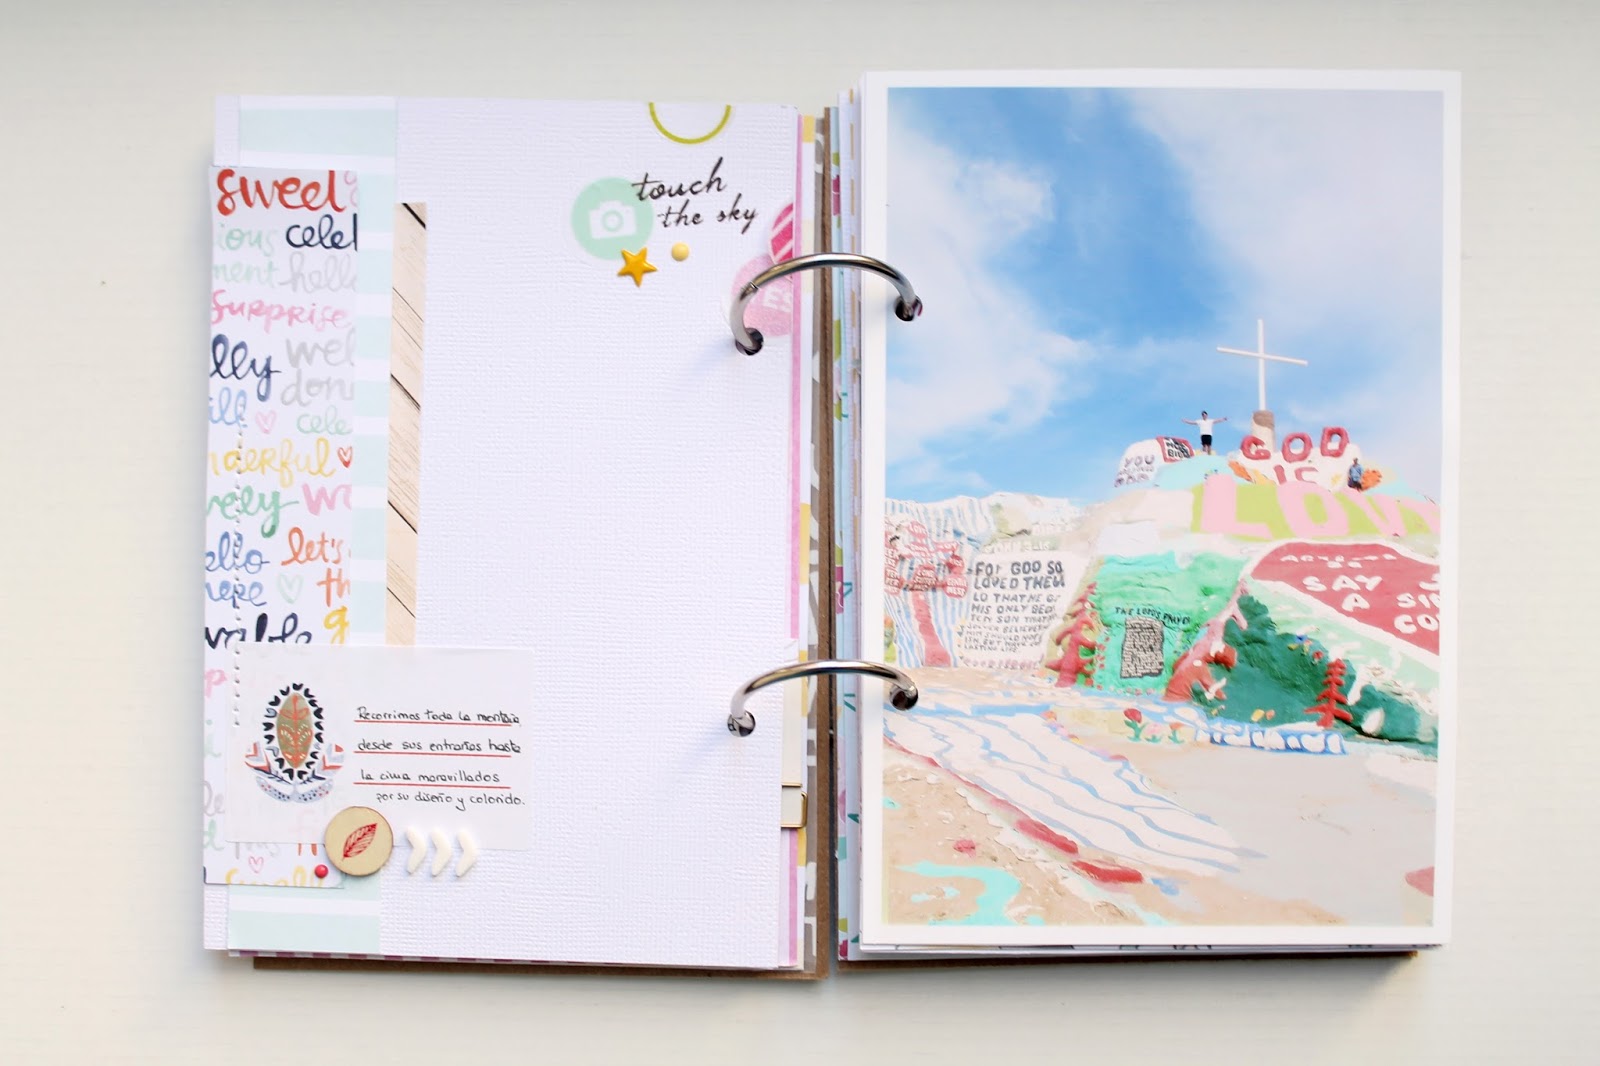
Salvation Mountain mini album

Hello everyone!

Time to share another mini album before the year comes to the end. I know everyone now is totally focused on december daily and on documenting all those little amazing moments of these holidays but maybe you can find some inspiration from this one too.

This album features our favorite photos from the day we went to Salvation Mountain in California. It is such an inspiring and colorful place in the middle of the desert with the purpose of spreading just a message of love. I tried my best to translate my memories of that place into this mini album by using colorful papers and even hand painting the cover so you could easily know what this mini is all about. Hope you enjoy it!


xoxo

Olatz

Nov 29, 2015

Joshua Tree National Park mini album

Happy Sunday everyone,

Just checking in really quick to show you a little mini album I made last month to document our day at the Joshua Tree Park in California. Now that the days are gloomy, let's cheer up with some sunny days adventures! ;) 

The mini is a little bit bigger than 4x3, I love that size! And inside the envelope I kept the entrance ticket, map and information about the trails. Seriously, we had so much fun at this place!


xoxo

Olatz

Oct 9, 2015

Accordion mini album

Hello everyone! 
I totally forget to share this quick 3×4 mini album with an accordion format that I shared on the Gossamer Blue Blog. Have you check it out already?
Blog post september 1
Here you can find a really simple step by step photo tutorial on how to create the base of your album. So… let’s get this started!
Blog post September2
1.First, grab all your favorites items from the September kits, including a piece of cardstock for the base of the album and your photos of course.
2.Start by cutting the cardstock into 3 strips of 12×4 inches. Remember NOT to cut the brand strip at the bottom because we are going to need it.
3.Then, fold each strip into 4 pieces of 4×3 with the help of a bone-folder.
4.Once you have them all folded, cut one of the 12×4 strips into two pieces of 6×4. Now, you have to adhere each piece of 4×6 to the brand strip at the bottom of each 12×4 strip. By doing this, you will end up with 2 strips of 18×4 inches.
5. To make the album more sturdy and chunky, I like to glue the two 18×4 stripss back to back. And done!
6. Now that you have the base for the mini album prepared, it is the moment to start adding your photos and playing with the different papers and embellishments from the kit to complete the album.
Blog post september3
Blog post september4
Don’t forget to add a front cover to one of the sides and a string to keep the album closed. I used one of the strings from a tag set included in the kits. Here you can have a closer look at the inside pages of the mini album.
Blog post September 5
I hope you liked this format and that this inspired you to give it a try!
#minialbum by Olatz for Gossamer Blue

xoxo
Olatz

Jun 8, 2015

27

Happy start of the week!

Today, I have another mini album to share with you. As some of you may remember, my goal for this year was to complete (and I say complete not start and left it half way through forgotten in a corner) at least 12 new mini albums. And so far I am right on track which makes me really happy as I love more and more each day to create these mini bundles of joy. ;)

Today's mini album is about my birthday back in February. It is 4x6 in size and I mixed full size photos with smaller ones. For the cover, I created a vellum confetti pocket filled with wood veneer numbers, sequin stars and paper confetti. Isn't it the cutest cover ever? And the best part is that is super fun to shake. Perfect for any party related mini!


A couple of months ago I shared a 12x12 layout with the same idea (find it here). I  hand stitched the vellum to the page by pre-making the holes with an Amy Tangerine sewing set before adding the thread by hand. I love how it turned out. 


For the inside pages, I mainly used the Dear Lizzy Fine & Dandy collection and some bits and pieces from my stash (mostly Studio Calico). I also added a vellum pocket with my journaling so I could keep the other pages rather simple and clean. I hope  this mini album inspired you to try something like this for an upcoming birthday party!


xoxo
Boo

/////////////////////////////////////
¡Feliz inicio de la semana!

Hoy, tengo otra mini álbum para compartir con vosotras. Como algunas recordaréis, mi objetivo para este año era completar (y digo completar, no empezar y dejarlos a medias olvidados en un rincón) por lo menos 12 nuevos mini álbumes. Y hasta ahora voy por buen camino, lo que me hace muy feliz ya que cada día me gustan más y más crear estos mini paquetes de alegría. ;)

El mini álbum de hoy es sobre mi pasado cumpleaños en febrero. Su tamaño es 4x6 y he mezclado fotos de tamaño completo con otros más pequeños. Para la portada, he creado una bolsillo de confeti lleno de números de madera, lentejuelas de estrellitas y confeti de papel. ¿No es la cubierta más mona del mundo? Y lo mejor es que es super divertido de agitar. ¡Perfecto para minis relacionados con fiestas!

Hace unos meses ya os enseñe una página 12x12 con la misma idea (podéis encontrarla aquí). Cosí a mano el vellum y para ello hice primeramente los agujeros con la ayuda de un punzón y una alfombrilla como las de los ordenadores, y después añadi el hilo a mano, resultando así mucho menos costoso. Me encanta el resultado final. Para las páginas interiores, usé principalmente la colección Fine & Dandy de Dear Lizzy y algunas cosillas más que tenía por ahí (en su mayoría Studio Calico). También he añadido un bolsillo de vellum con mi diario para pode así mantener las otras páginas sencillas y limpias. ¡Espero que este mini álbum os inspire a intentar algo como esto para una próxima fiesta de cumpleaños!

xoxo
Boo